
Diversity in Art
 |
 |
As with anything in life, particularly art, there are a million ways to do something. Glass etching is no different.
Some use special acidic etching creams that effectively do the patterning work of an artisan. Some use hand tools. And others use power equipment such as sandblasters.
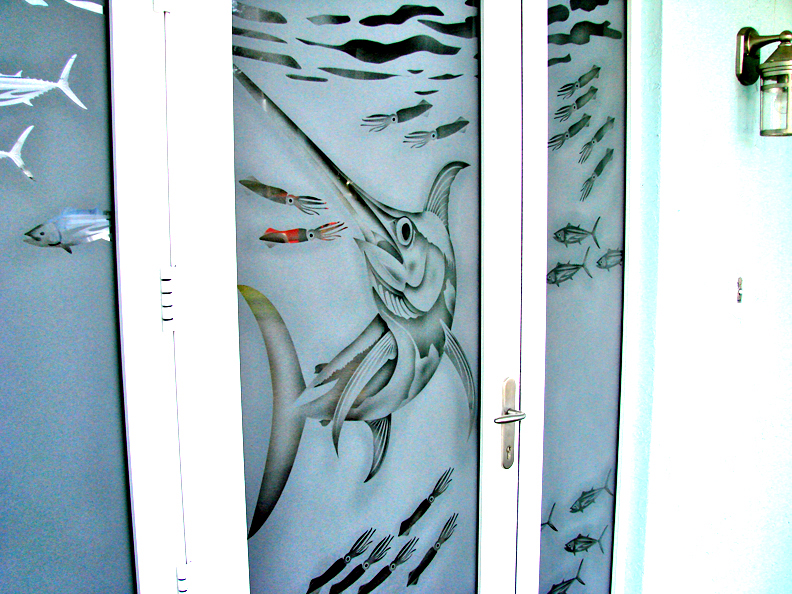
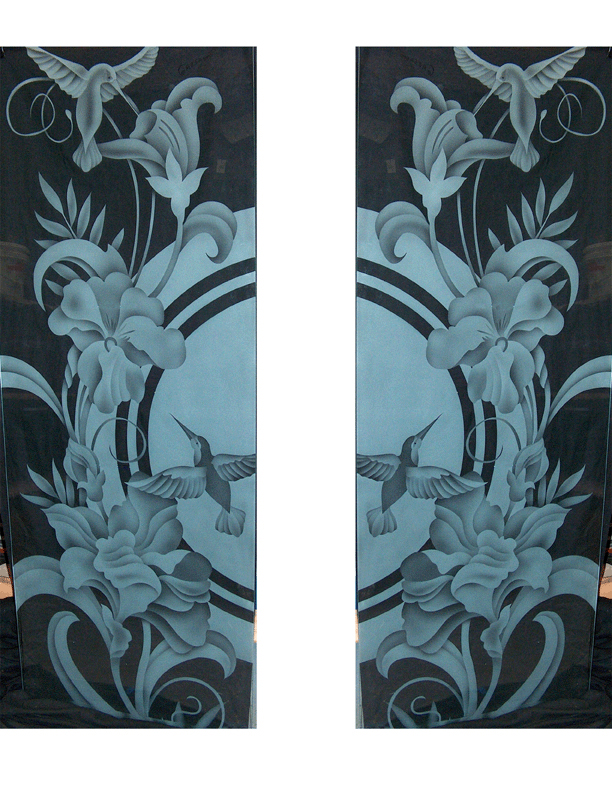
Different tools and different techniques are all influenced by the intent of the project. Some might use a sandblaster and etching cream to create a lively coral reef etching. Another might use a pick and hammer to chisel the female form into a bedroom mirror.
The idea is – all ideas are welcome.
Synthesis is essential to great art and great artists. Monotonous methods rarely lead to the most extraordinary and inimitable artwork. For, it is at the intersection of various notions and approaches where original genius is born.
All those who frost glass do not necessarily limit themselves to the process, just as those who do not currently manufacture frosted glass might do so some day.
Glass Frosting Benefits
Frosting though, is an interesting approach to glass art.
The effects created by it can render more intense images, kindly. It can achieve an ambiance and light reflectivity that enamors its viewers.
It is useful in providing people with privacy. It does this by allowing light to stream into a room while blurring from the outside what goes on inside.
Frosting glass also requires a unique set of skills that can be applied later on in other artistic and inventive venues.
So, how is glass frosted?
How to create a Frosted Glass Etching
The most basic way to produce a piece of frosted glass artwork is to follow these steps:
- Cover the glass piece with masking tap. Do this thoroughly and carefully. Make sure that the tape is as flush as possible. Uneven spots can throw off an entire design and waste hours and hours of hard work.
- Find a design either online or in a magazine, or draft it yourself. Once you have decided what motif you are going to use, draw it onto the masking tape. This can be difficult on glasses and other rounded glass objects, however doing it this way allows you to maintain the proportions you’ll need, which a flat surface cannot.
- Yielding a craft knife or an exact-o knife, trace the design diligently. It is better you spend your time doing it right once, than twice wrong. Be careful not to press too hard because this can dull the blade and render it ineffectual. Also, watch out for pressing too soft because then you’ll barely make a mark. The key is finding a happy medium.
- When finished peel away any tape left stuck to your glass canvas. This should give you a clear view of your design and how it came out. If you are not happy with it – try again. Practice makes perfect. Also, really make sure no tape is left on the glass, perhaps soak it is war soapy water for a few minutes be sure.
- Use a frosting spray evenhandedly and lightly. The idea is to not “over frost” it. This can blur the image and even make parts of it disappear. It is better to frost a bit at a time, adding more if needed, than to do it all at once. You can always add more frost, but once it is on, you cannot take it away. It is a done deal.
- Let the frosting solution do its job and leave it sit for a few hours. Then, enjoy your beautifully frosted glass art!